|
键盘允许用户在程序运行时输入数据。本篇文章主要介绍如何将一个带有十二个按键的键盘连接到Arduino开发板以及如何使用库Keypad.h。
通常需要键盘来为Arduino开发板提供输入信号,而薄膜键盘是许多应用的经济型解决方案。它们非常薄,可以轻松安装在任何需要的地方。
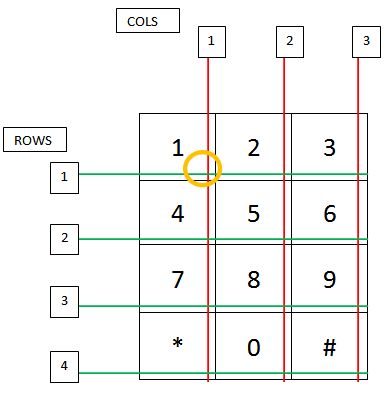
在本篇文章中,我们将演示如何使用12键数字键盘,类似于电话上的键盘。 12键键盘有三列四行。按下按钮会将其中一个行输出短接到其中一个列输出。根据这些信息,Arduino可以确定按下了哪个按键。例如,当按下1键时,列1和行1短接。 Arduino会检测到并向程序输入1。
在键盘内部行排列和列排列如下图所示。

实验 对于这个实验,我们演示了Arduino库“keypad.h”。当用户按下键盘上的按键时,程序将在串口监视器显示该值。
需要的硬件 ● Arduino Mega 2560开发板 ● 3x4矩阵键盘 ● 连接导线 ● 面包板
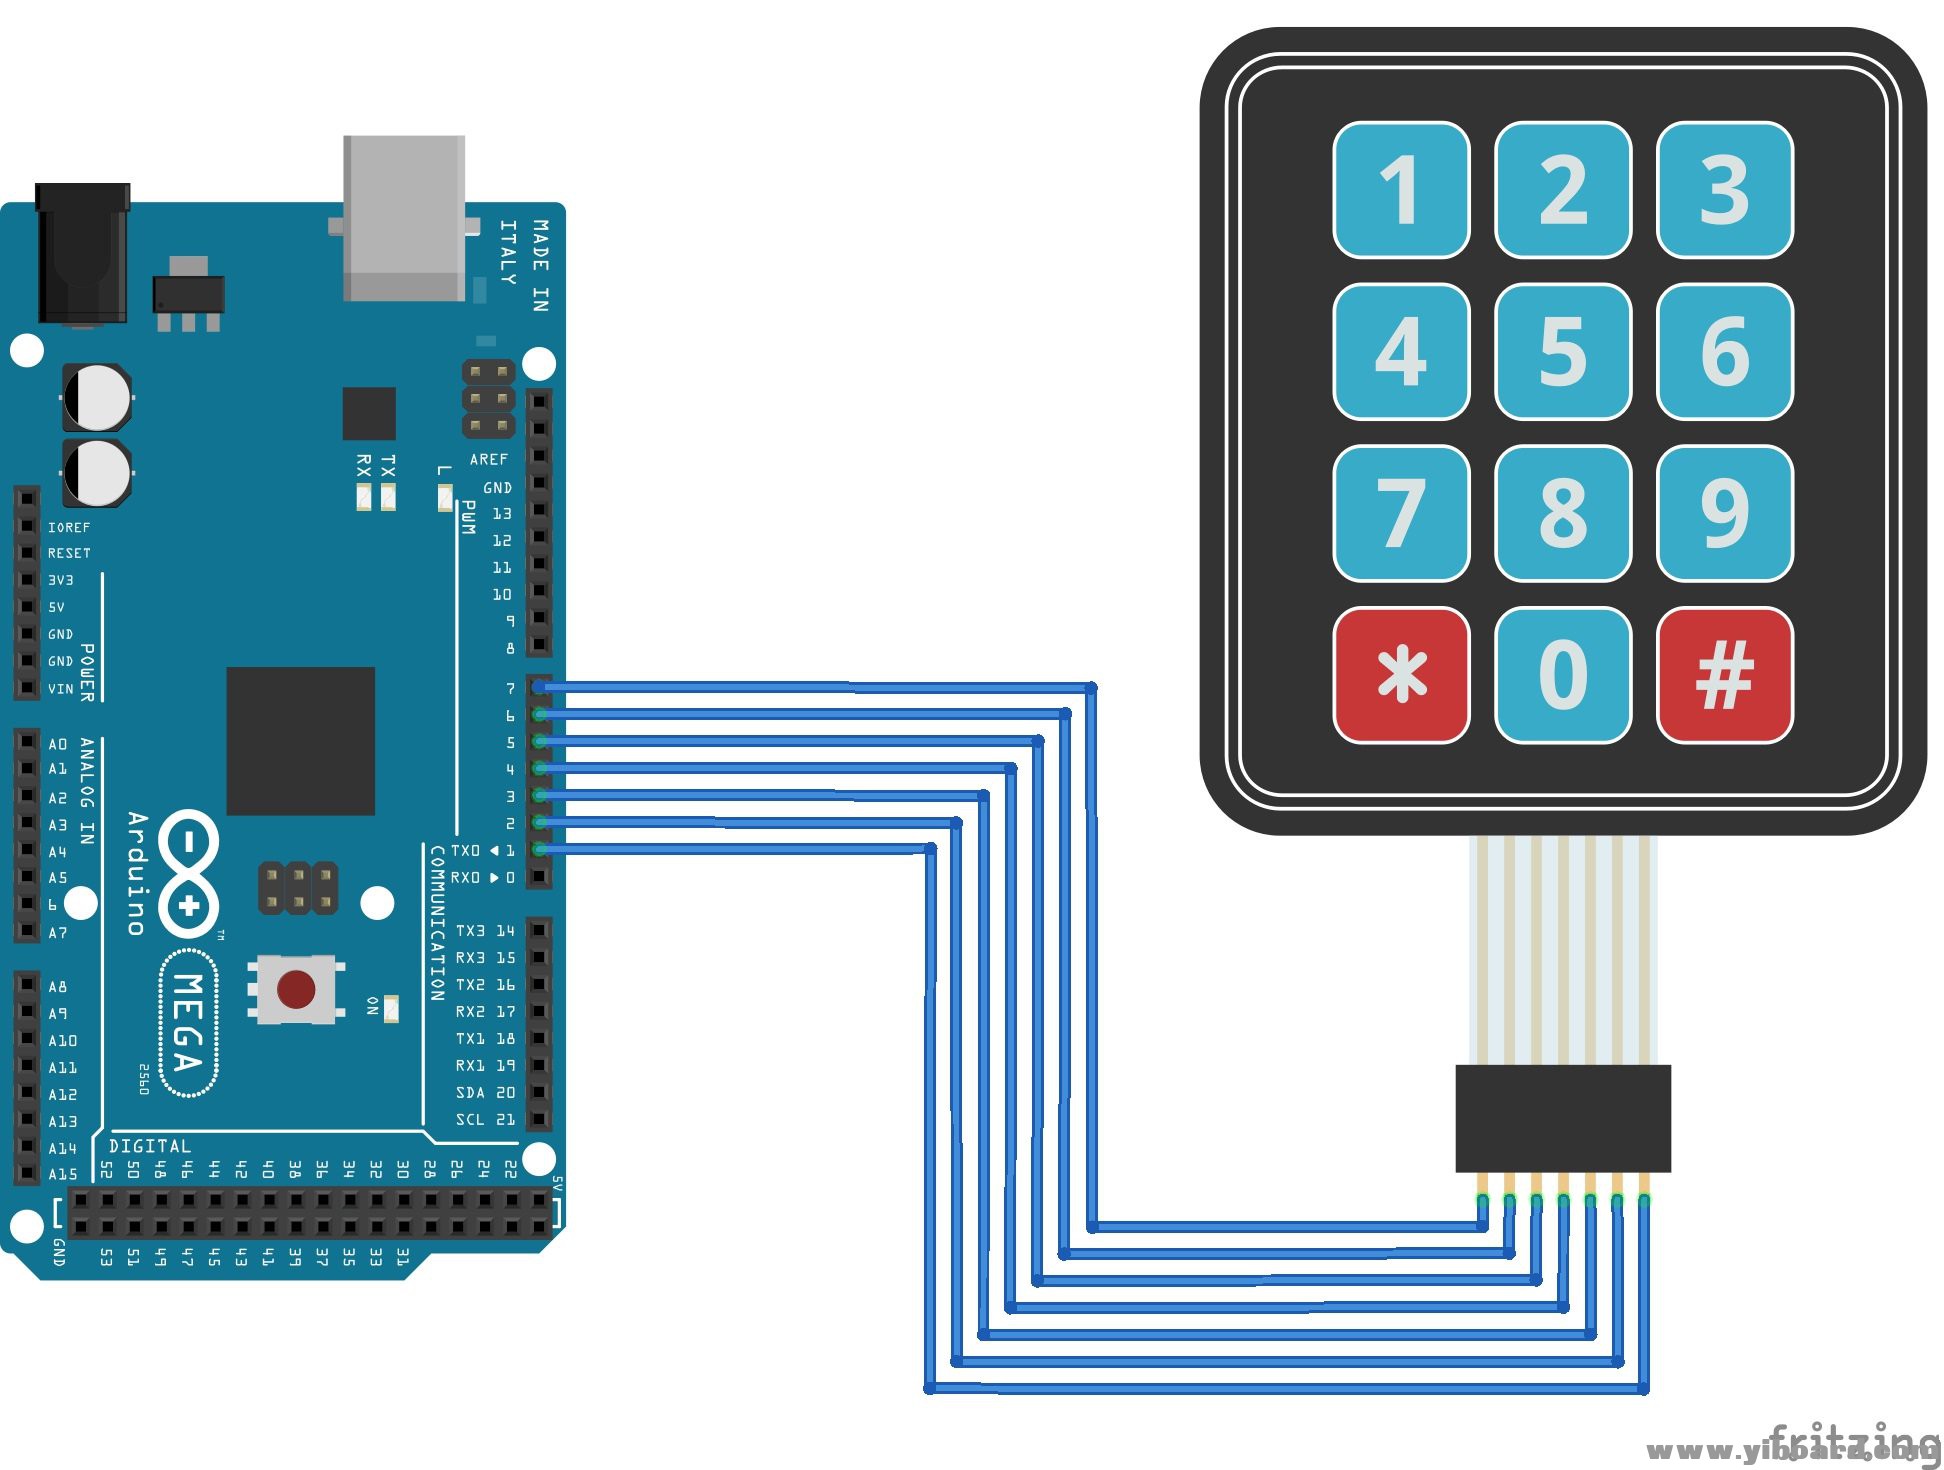
接线图 将键盘连接到Arduino,如下所示。

代码 - /* the tutorial code for 3x4 Matrix Keypad with Arduino is as
- This code prints the key pressed on the keypad to the serial port*/
- #include "Keypad.h"
- const byte Rows= 4; //number of rows on the keypad i.e. 4
- const byte Cols= 3; //number of columns on the keypad i,e, 3
- //we will definne the key map as on the key pad:
- char keymap[Rows][Cols]=
- {
- {'1', '2', '3'},
- {'4', '5', '6'},
- {'7', '8', '9'},
- {'*', '0', '#'}
- };
- // a char array is defined as it can be seen on the above
- //keypad connections to the arduino terminals is given as:
- byte rPins[Rows]= {A6,A5,A4,A3}; //Rows 0 to 3
- byte cPins[Cols]= {A2,A1,A0}; //Columns 0 to 2
- // command for library forkeypad
- //initializes an instance of the Keypad class
- Keypad kpd= Keypad(makeKeymap(keymap), rPins, cPins, Rows, Cols);
- void setup()
- {
- Serial.begin(9600); // initializing serail monitor
- }
- //If key is pressed, this key is stored in 'keypressed' variable
- //If key is not equal to 'NO_KEY', then this key is printed out
- void loop()
- {
- char keypressed = kpd.getKey();
- if (keypressed != NO_KEY)
- {
- Serial.println(keypressed);
- }
- }
总结 这是一个非常简单的示例,您可以看到将键盘输入添加到Arduino程序中是多么容易。您可以将此类输入用于许多不同的项目,包括:
● 门锁 ● 输入PWM ● 闹钟 ● 安全锁 |