|
音调键盘(Simple keyboard using the tone() function) 本示例展示了如何使用tone()命令根据按下的传感器来产生不同的音调。
所需硬件 - Arduino或者Genuino开发板 - 8欧的扬声器
- 3个压力感应电阻 - 3个10k电阻 - 100欧电阻 - 导线 - 面包板
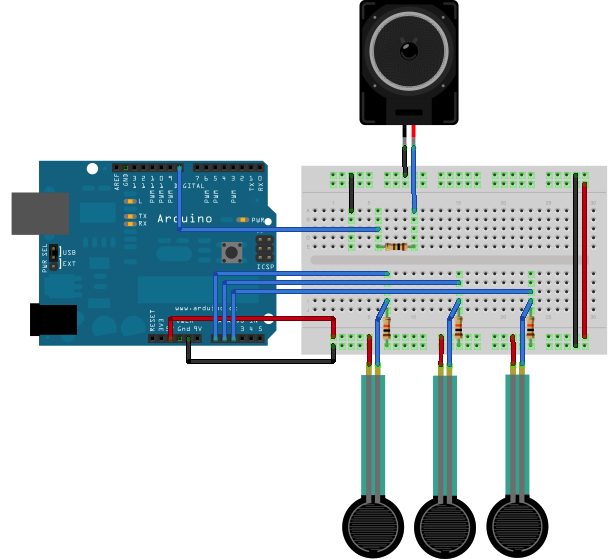
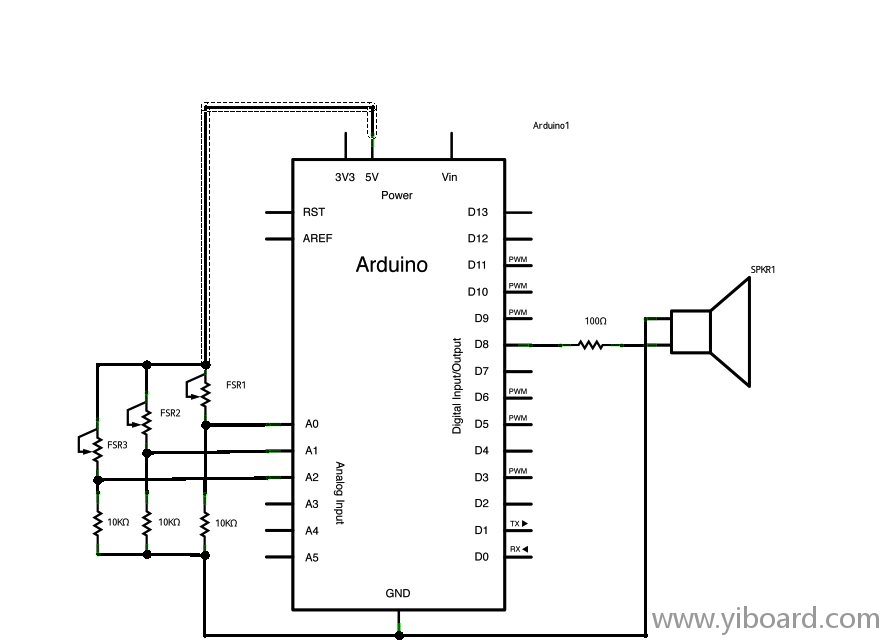
电路连接方式 将扬声器的一端通过一个100欧的电阻连接到数字8脚,扬声器的另一端连接到地。 将3个压力感应电阻FSR并联,连接到到5V电源。每个传感器连接到模拟输入0-2脚,在每个输入回路使用一个10K(作为参考)的电阻连接到地。

原理图

代码 下面的程序读取三个模拟传感器。每个传感器对应一个音符数组里的音符值。如果任何一个传感器的值超过给定的阈值,那么就会播放相应的音符。 以下是主要的程序: - /*
- keyboard
- Plays a pitch that changes based on a changing analog input
- circuit:
- * 3 force-sensing resistors from +5V to analog in 0 through 5
- * 3 10K resistors from analog in 0 through 5 to ground
- * 8-ohm speaker on digital pin 8
- created 21 Jan 2010
- modified 9 Apr 2012
- by Tom Igoe
- This example code is in the public domain.
- http://www.arduino.cc/en/Tutorial/Tone3
- */
- #include "pitches.h"
- const int threshold = 10; // minimum reading of the sensors that generates a note
- // notes to play, corresponding to the 3 sensors:
- int notes[] = {
- NOTE_A4, NOTE_B4, NOTE_C3
- };
- void setup() {
- }
- void loop() {
- for (int thisSensor = 0; thisSensor < 3; thisSensor++) {
- // get a sensor reading:
- int sensorReading = analogRead(thisSensor);
- // if the sensor is pressed hard enough:
- if (sensorReading > threshold) {
- // play the note corresponding to this sensor:
- tone(8, notes[thisSensor], 20);
- }
- }
- }
|