|
在本篇文章中,我们将主要介绍如何使用Arduino制作一款激光光栅。它可以检测出发射器和接收器之间的任何物体运动。发送器采用激光模块(Keyes KY-008),它可以发射红光(波长:650nm)。激光探测器/接收器是一个不知名的模块,可以返回LOW信号或HIGH信号。

所需的材料清单: – Arduino Uno开发板 – 跳线 – 激光头发射模块KY-008 – 激光探测器/接收器
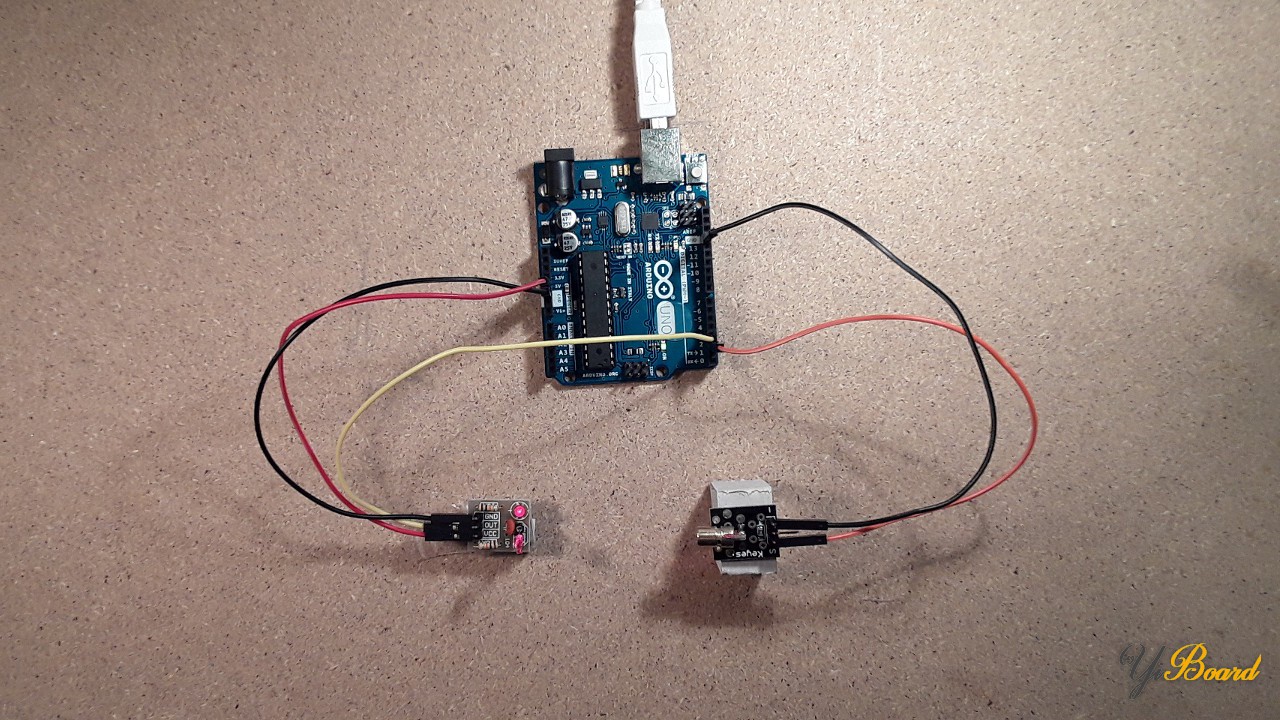
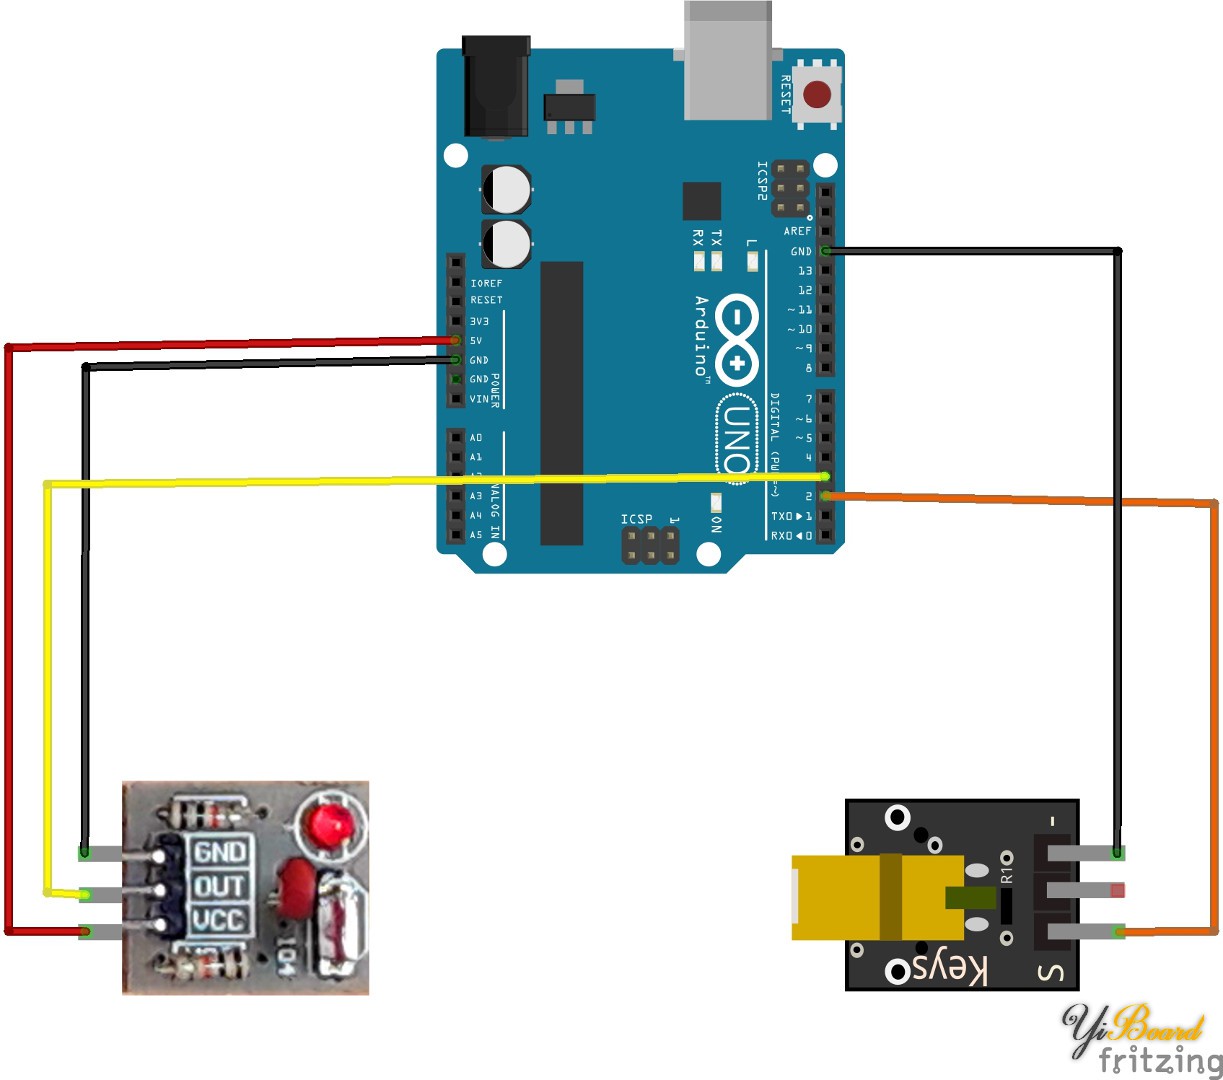
发射器和接收器的连接 激光发射模块有三个引脚。仅使用两个引脚:“-”引脚连接到Arduino的GND引脚。“ S”引脚连接到Arduino的引脚2。这样,可以通过控制向引脚2发送LOW信号或HIGH信号来关闭或打开激光发射器。接收器模块也有三个引脚。模块的“ VCC”引脚连接到Arduino的5V引脚,模块的GND连接到Arduino的GND。最后,将模块的信号引脚“OUT”连接到引脚3。

激光光栅的连接示意图。
如何编程激光光栅? 首先,我们在代码中定义激光发射器和接收器使用引脚编号。接下来,将发射器引脚设置为OUTPUT模式,接收器引脚设置为INPUT模式。然后,通过将“pinLaser”设置为HIGH打开激光发射器。为了监视光栅的状态,启用串口连接。 在loop函数中,读取接收器的返回值。该返回值可以为LOW或HIGH。 LOW(低电平)表示激光未到达接收器,例如,某些东西穿过了光栅,并且位于激光发射器和检测器之间。然后,将接收器的值写入控制台。最后,为方便起见,添加了1000ms的延迟。 - // (c) Michael Schoeffler, http://www.mschoeffler.de
- const int pinLaser = 2; // output signal pin of laser module/laser pointer
- const int pinReceiver = 3; // input signal pin of receiver/detector (the used module does only return a digital state)
- void setup() {
- pinMode(pinLaser, OUTPUT); // set the laser pin to output mode
- pinMode(pinReceiver, INPUT); // set the laser pin to output mode
- digitalWrite(pinLaser, HIGH); // emit red laser
- Serial.begin(9600); // Setup serial connection for print out to console
- }
- void loop() {
- int value = digitalRead(pinReceiver); // receiver/detector send either LOW or HIGH (no analog values!)
- Serial.println(value); // send value to console
- delay(1000); // wait for 1000ms
- }
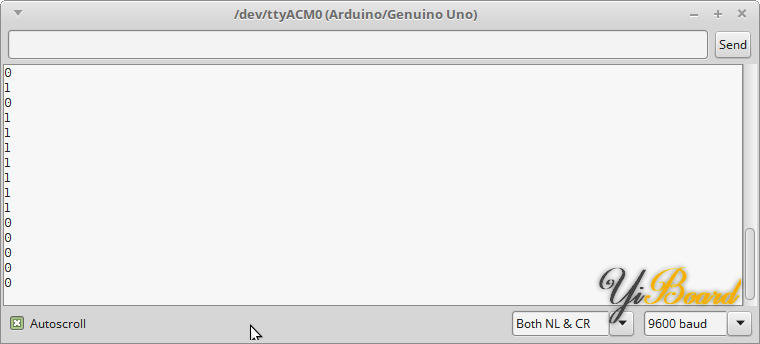
代码成功上传到Arduino后,则串口监视器(Tools->Serial Monitor或使用快捷键Ctrl + Shift + M)上的输出应如下所示:

光栅示例的串口监视器输出。
如果光栅内有物体移动,那么显示器上将打印输出“ 0”。否则,如果激光进入接收器,则会打印输出“ 1”。 |