|
创建一个简单的短代码(shortcode) 我们将要创建一个“短代码[shortcode]”。然后该短代码可以用于网页的任何地方,并被实际的温度值替代。
我们的短代码称为fa-tmp101。在fa-tmp101-temperature-sensor.php的结尾处添加以下代码: - //[fa-tmp101] shortcode. It will read and show the value of TMP101 OpenRex sensor (not yet, we will later add more stuff here)
- add_shortcode("fa-tmp101", "fa_access_tmp101_sensor");
- function fa_access_tmp101_sensor($atts, $content = null)
- {
- //$new_content will replace the [fa-tmp101] shortcode, initially will use a simple text "Reading ..."
- $new_content = '<span id="fa_tmp101">Reading ...</span>';
-
- //$new_content string is processed and will be shown instead of the shortcode
- $html_output = do_shortcode($new_content);
- return $html_output;
- }
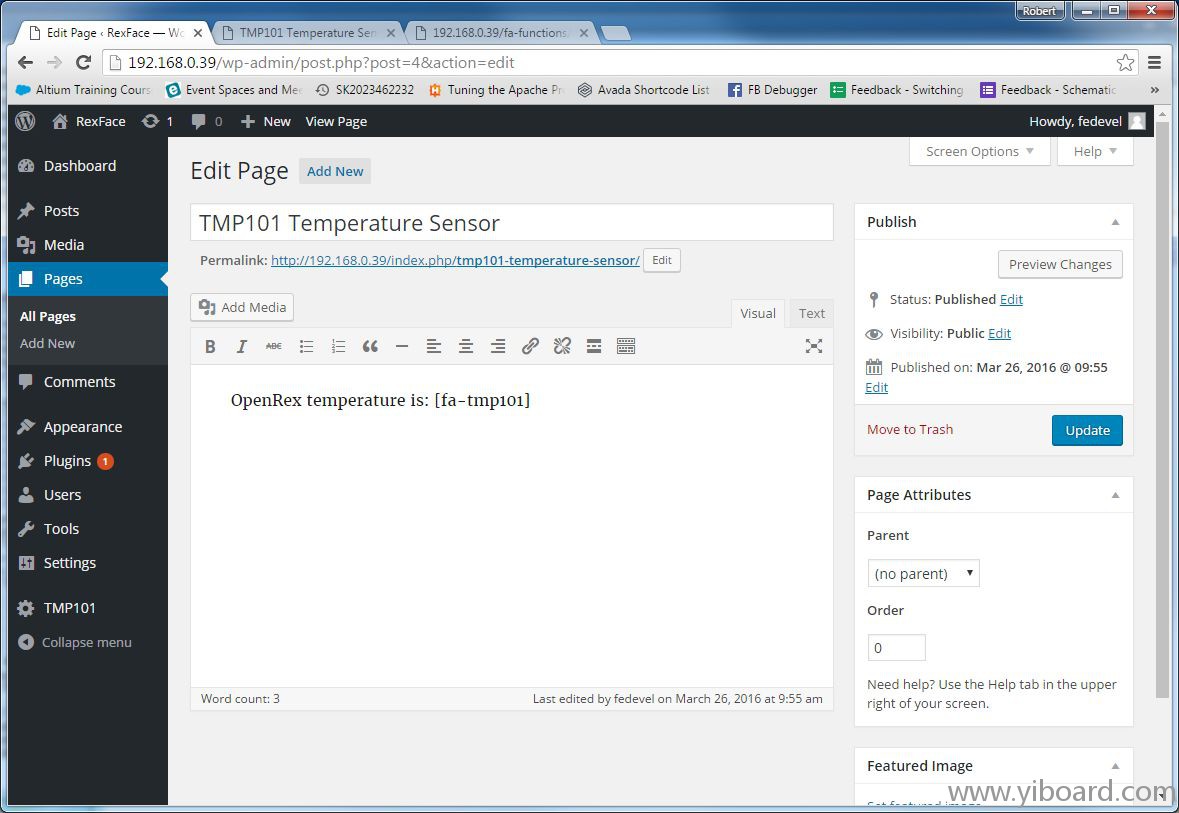
创建一个测试网页 在WordPress管理菜单,点击“Pages”,然后点击“Add New”。输入标题“TMP101 Temperature Sensor”,并使用以下文字“OpenRex temperature is: [fa-tmp101]”。然后点击“Publish”按钮。如下图所示:

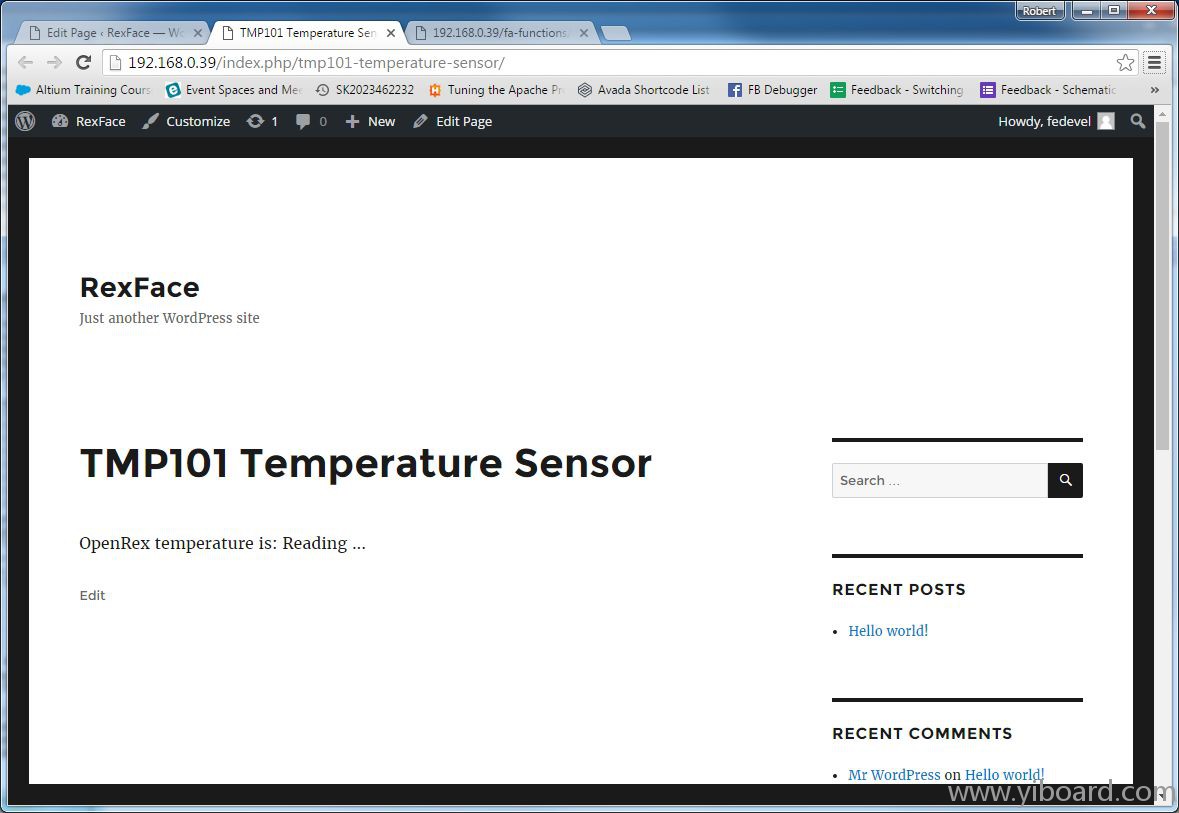
转到TMP101 Temperature Sensor页面。页面的URL链接类似于“http://192.168.0.39/index.php/tmp101-temperature-sensor/”,网页内容如下图(注意:短代码fa-tmp101替换为文本“Reading...”):

很不错,短代码正常工作了,现在我们需要做的仅仅是更新内容。按照以下步骤继续操作。
准备读取温度 会变得更加复杂些,因为我们想具有一定的灵活性。我们使用JavaScript来读取温度(这将给我们单击读取温度带来一些灵活性,而且它会提供一些选项自动在一段时间间隔内读取温度)。然而,JavaScript本省不能在OpenRex上运行应用程序。相反,我们必须从JavaScript中调用PHP文件,并且在PHP文件中我们将调用一个能实际读取温度的应用程序。我们开始做吧。
首先,我们将更新短代码。使用新的短代码替换旧的短代码。新代码中我们创建了一些隐藏的变量来传输一些变量(IP地址和单位)到JavaScript,我们还创建了一个按钮,用来读取温度。 - //[fa-tmp101] shortcode. It will read and show the value of TMP101 OpenRex sensor (still not yet :)
- add_shortcode("fa-tmp101", "fa_access_tmp101_sensor");
- function fa_access_tmp101_sensor($atts, $content = null)
- {
- //$new_content will replace the [fa-tmp101] shortcode
- $new_content = '<span id="fa_tmp101">Reading ...</span>';
- $new_content .= '<div style="background-color:#cacaca;border: 1px solid #acacac; text-align:center; width:300px" onclick="fa_access_tmp101();" >Read Temperature Now</div>'; //button
- $new_content .= '<input type="hidden" id="fa_openrex_ip" value="'.$_SERVER['SERVER_ADDR'].'" />'; //transfer IP address to javascript
- $new_content .= '<input type="hidden" id="fa_tmp101_units" value="celsius" />'; //transfer unites to javascript
-
- //$new_content string is processed and will be shown instead of the shortcode
- $html_output = do_shortcode($new_content);
- return $html_output;
- }
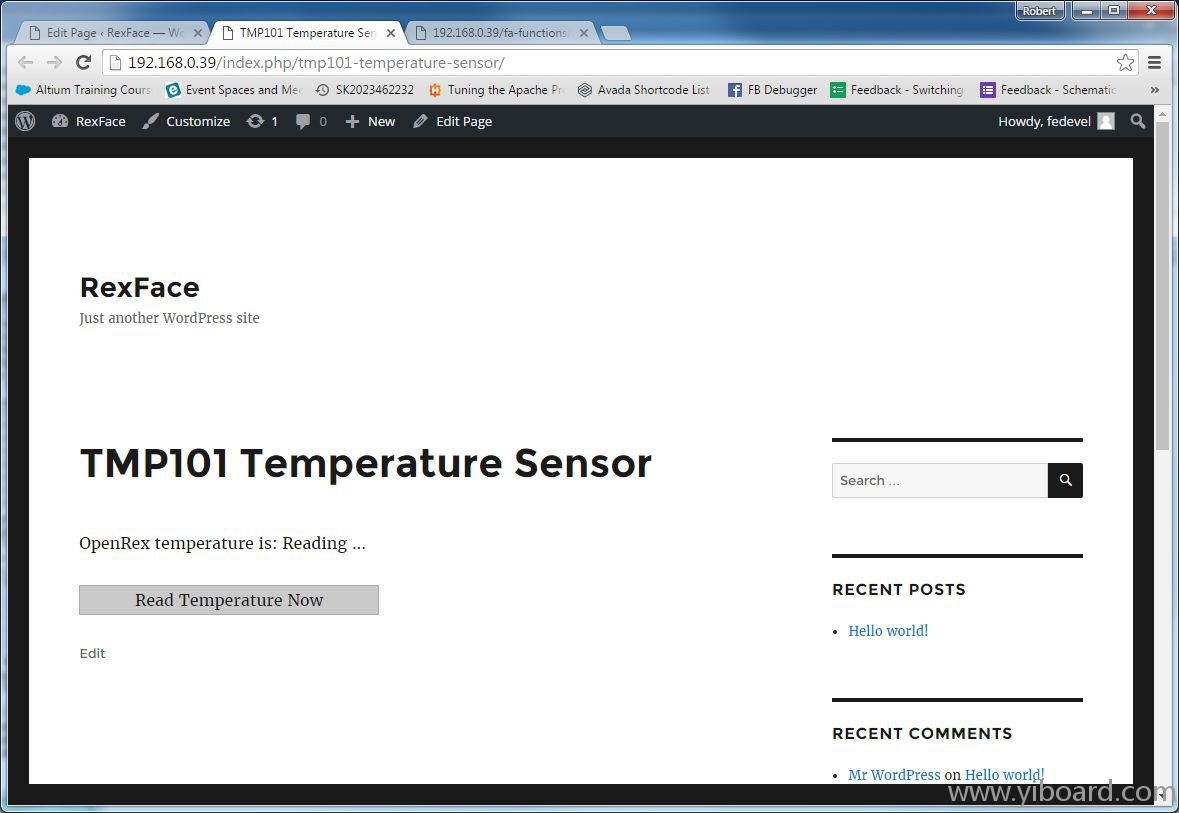
当刷新“TMP101 Temperature Sensor”页面时,你会注意到,我们增加了一个“Read Temperature Now”按钮。如果看一下代码,你会发现,当点击该按钮时,它会调用“fa_access_tmp101()”函数。该函数位于JavaScript中,我们稍后会创建一些。所以不要点击该按钮,它还没有正常工作。

现在,创建该PHP文件,我们将会从JavaScript中调用,并且稍后会调用应用程序来读取传感器数据。现在,它只会返回一条信息“...accessing sensor ...”。
在插件目录创建一个名为“tmp101.php”的新文件。 - nano /usr/local/apache2/htdocs/wp-content/plugins/fa-tmp101-temperature-sensor/tmp101.php
将以下代码放于/usr/local/apache2/htdocs/fa-functions/tmp101.php。 - <?php
- /*
- Example of the URL address for this file is http://openrex_IP_address/wp-content/plugins/fa-tmp101-temperature-sensor/tmp101.php?units=celsius
- */
-
- $temperature_units = empty($_GET['units'])?'celsius':$_GET['units']; //get temperature units from url, if empty, use celsius
-
- //here we later add the code to read temperature sensor
-
- //this is our response, this is the format how we will send information to javascript.
- $result = array(
- 'openrex' => array(
- 'sensors' => array(
- 'tmp101' => array(
- 'units' => $temperature_units,
- 'temperature' => '... accessing sensor ...'
- ),
- ),
- ),
- 'valid' => 'true',
- 'error_msg' => '',
- );
-
- $response = json_encode( $result); //this will translate our $result array into JSON format
- echo $response; //this will send the $response back to our javascript
- ?>
你可以简单的检查一下"tmp101.php"将会向JavaScript返回什么。进入因特网浏览器,输入网址,如"http://192.168.0.39/wp-content/plugins/fa-tmp101-temperature-sensor/tmp101.php",你会看到:

现在,创建JavaScript文件: - mkdir /usr/local/apache2/htdocs/wp-content/plugins/fa-tmp101-temperature-sensor/js/
- nano /usr/local/apache2/htdocs/wp-content/plugins/fa-tmp101-temperature-sensor/js/tmp101.js
在JavaScript文件中,我们调用tmp101.php PHP文件。在tmp101.js插入以下代码: - //This function will read temperature of OpenRex board by accessing to tmp101.php file and reading TMP101 sensor value
- function fa_access_tmp101()
- {
- //read IP address and units from our hidden elements created in [shortcode] section of the fa-tmp101-temperature-sensor.php file
- var openrex_ip_address = document.getElementById("fa_openrex_ip").value; //this will take the value from our hidden input element which has id=fa_openrex_ip (we created it in fa-tmp101-temperature-sensor.php)
- var temperature_units = document.getElementById("fa_tmp101_units").value; //this will take the value from our hidden input element which has id=fa_tmp101_units (we created it in fa-tmp101-temperature-sensor.php)
-
- //prepare variables
- var temperature_value = document.getElementById("fa_tmp101"); //this will create a "pointer" to our <span id="fa_tmp101"></span>, so we can replace its content
- var url = 'http://'+openrex_ip_address+'/wp-content/plugins/fa-tmp101-temperature-sensor/tmp101.php?units='+temperature_units; //url of our tmp101.php file
-
- //this will call tmp101.php file to read the sensor
- request = jQuery.ajax({
- dataType: "json",
- url: url,
- });
-
- //here we will proceed the answer from tmp101.php file
- request.done (function( data ) { //this will be executed when we get an answer from tmp101.php
- console.log("Done"); //debug output, you can see this in console output (e.g. in Chrome use Right Click -> Inspect element -> Console)
- console.log(data); //debug output
-
- if (data['valid']==='true')
- {
- //replace <span id="fa_tmp101"></span> content with the temperature and units
- temperature_value.innerHTML = data['openrex']['sensors']['tmp101']['temperature']+' '+data['openrex']['sensors']['tmp101']['units'];
- return true;
- }
- else
- {
- //replace <span id="fa_tmp101"></span> content with the error message
- temperature_value.innerHTML = data['error_msg'];
- return false;
- }
- });
-
- request.fail (function( data ) { //this will be executed if we will not get answer from tmp101.php
- console.log("Failed"); //debug output
- //replace <span id="fa_tmp101"></span> content with "Connection failed" message
- temperature_value.innerHTML = 'Connection failed';
- return false;
- });
- }
我们需要回到主插件文件,并告诉其加载该JavaScript。在fa-tmp101-temperature-sensor.php结尾添加以下代码: - //we will be using javascript, so load the javascript file
- add_action( 'wp_enqueue_scripts', 'fa_tmp101_scripts' );
- function fa_tmp101_scripts() {
- wp_enqueue_script("jquery-fa-tmp101", plugins_url("/js/tmp101.js", __FILE__ ),array('jquery', 'jquery-ui-core'));
- }
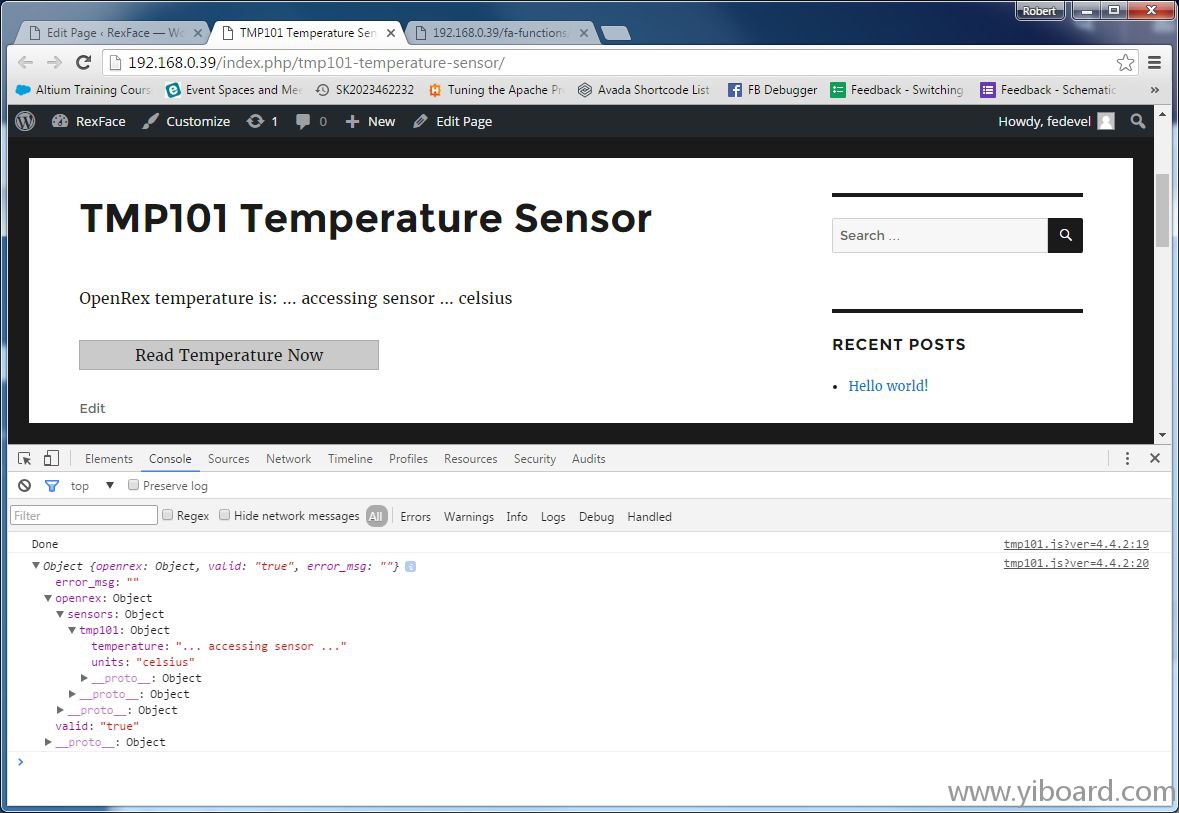
转到TMP101 Temperature Sensor页面。刷新。我们将会看到JavaScript是否工作正常。在页面右击,并选择“Inspect elements”。单击“Console”,并点击“Read Temperature Now”按钮。注意,现在显示的不是“Reading...”,而是“... accessing sensor ... ”。在“Console”窗口检查回应。你会看到tmp101.php的返回:Object -> openrex -> sensors -> tmp101。如下:

|