|
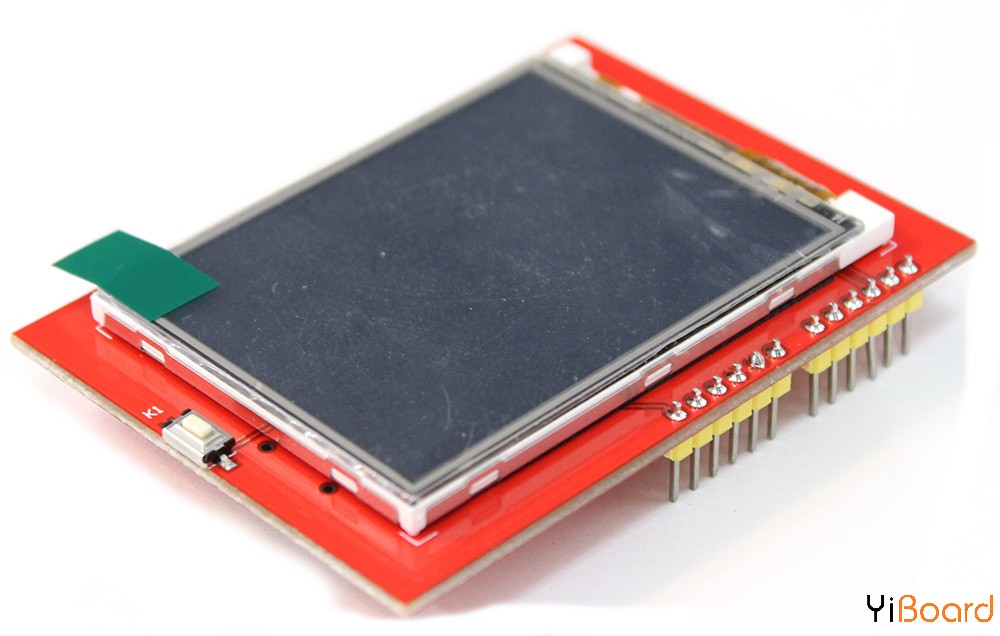
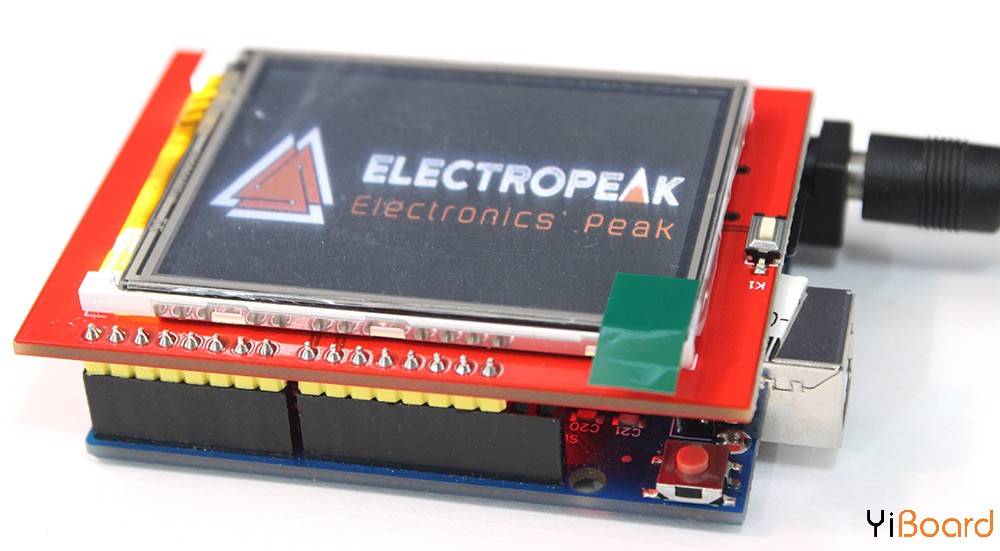
在本篇文章中,您将学习如何使用和设置用于Arduino的2.4寸触摸LCD扩展板。首先,您将看到有关此扩展板的一些基础信息。在学习如何设置扩展板之后,您将看到3个实际项目。
Arduino 2.4寸触摸屏扩展板的功能 屏幕在电子项目中的作用非常重要。屏幕可以是非常简单的类型,例如7段或字符LCD或更高级的模型,如OLED和TFT LCD。

2.4寸TFT液晶屏是最广泛使用的图形屏幕之一。以下是其最重要的功能: ● 分辨率为240 * 320像素 ● 能够显示262000种不同的颜色 ● 包括触摸板 ● 5v供电电压
Arduino引脚2、3、A5和A4是空闲的,您可以使用它们连接此扩展板。

2.4寸触摸屏所需的库 我们需要用到以下几个库文件:Adafruit GFX库、Adafruit TouchScreen库和Adafruit TFT LCD库。 TFTLCD库支持932x、7575、9341和HX8357D驱动器。 如果您的液晶显示屏无法使用此库,请尝试使用Mcufriend_kbv。 您可以使用引脚A0至A5将命令应用于此LCD。如果使用SD卡,所有Arduino引脚都将处于忙状态。
如何校准触摸屏? 该LCD最重要的功能之一是包括触摸屏。如果您要使用液晶显示屏,则需要知道触摸点的坐标。为此,您应该在Arduino板上上传以下代码并打开串行监视器。然后触摸所需位置并写入串行监视器上显示的坐标。您可以在任何其他项目中使用此校准。 - /*
- TFT LCD - TFT Touch Coordinate
- */
- #include <stdint.h>
- #include "TouchScreen.h"
- #define YP A2
- #define XM A3
- #define YM 8
- #define XP 9
- // For better pressure precision, we need to know the resistance
- // between X+ and X- Use any multimeter to read it
- // For the one we're using, its 300 ohms across the X plate
- TouchScreen ts = TouchScreen(XP, YP, XM, YM, 300);
- void setup(void) {
- Serial.begin(9600);
- }
- void loop(void) {
-
- TSPoint p = ts.getPoint();
- if (p.z > ts.pressureThreshhold) {
- Serial.print("X = "); Serial.print(p.x);
- Serial.print("\tY = "); Serial.print(p.y);
- Serial.print("\tPressure = "); Serial.println(p.z);
- }
- delay(100);
- }
TSPoint p = ts.getPoint(); 将长度(x)、宽度(y)和压力(z)存储到p对象。
在Arduino 2.4寸LCD上显示文本和形状 - /*
- TFT LCD - TFT Simple driving
- modified on 21 Feb 2019
- by Saeed Hosseini
- https://electropeak.com/learn/
- */
- #include <Adafruit_GFX.h>
- #include <Adafruit_TFTLCD.h>
- #define LCD_CS A3
- #define LCD_CD A2
- #define LCD_WR A1
- #define LCD_RD A0
- #define LCD_RESET A4
- #define BLACK 0x0000
- #define BLUE 0x001F
- #define RED 0xF800
- #define GREEN 0x07E0
- #define CYAN 0x07FF
- #define MAGENTA 0xF81F
- #define YELLOW 0xFFE0
- #define WHITE 0xFFFF
- #define ORANGE 0xFD20
- #define GREENYELLOW 0xAFE5
- #define NAVY 0x000F
- #define DARKGREEN 0x03E0
- #define DARKCYAN 0x03EF
- #define MAROON 0x7800
- #define PURPLE 0x780F
- #define OLIVE 0x7BE0
- #define LIGHTGREY 0xC618
- #define DARKGREY 0x7BEF
- Adafruit_TFTLCD tft(LCD_CS, LCD_CD, LCD_WR, LCD_RD, LCD_RESET);
- void setup() {
- Serial.begin(9600);
- Serial.println(F("TFT LCD test"));
- #ifdef USE_ADAFRUIT_SHIELD_PINOUT
- Serial.println(F("Using Adafruit 2.4" TFT Arduino Shield Pinout"));
- #else
- Serial.println(F("Using Adafruit 2.4" TFT Breakout Board Pinout"));
- #endif
- Serial.print("TFT size is ");
- Serial.print(tft.width());
- Serial.print("x");
- Serial.println(tft.height());
- tft.reset();
- uint16_t identifier = tft.readID();
- if (identifier == 0x9325) {
- Serial.println(F("Found ILI9325 LCD driver"));
- } else if (identifier == 0x9328) {
- Serial.println(F("Found ILI9328 LCD driver"));
- } else if (identifier == 0x7575) {
- Serial.println(F("Found HX8347G LCD driver"));
- } else if (identifier == 0x9341) {
- Serial.println(F("Found ILI9341 LCD driver"));
- } else if (identifier == 0x8357) {
- Serial.println(F("Found HX8357D LCD driver"));
- } else {
- Serial.print(F("Unknown LCD driver chip: "));
- Serial.println(identifier, HEX);
- Serial.println(F("If using the Adafruit 2.4" TFT Arduino shield, the line:"));
- Serial.println(F(" #define USE_ADAFRUIT_SHIELD_PINOUT"));
- Serial.println(F("should appear in the library header (Adafruit_TFT.h)."));
- Serial.println(F("If using the breakout board, it should NOT be #defined!"));
- Serial.println(F("Also if using the breakout, double-check that all wiring"));
- Serial.println(F("matches the tutorial."));
- return;
- }
- tft.begin(identifier);
- Serial.println(F("Benchmark Time (microseconds)"));
- Serial.print(F("Screen fill "));
- Serial.println(FillScreen());
- delay(500);
- tft.setTextColor(YELLOW);
- tft.setCursor(70, 180);
- tft.setTextSize(1);
- tft.println("Electropeak");
- delay(200);
- tft.fillScreen(PURPLE);
- tft.setCursor(50, 170);
- tft.setTextSize(2);
- tft.println("Electropeak");
- delay(200);
- tft.fillScreen(PURPLE);
- tft.setCursor(20, 160);
- tft.setTextSize(3);
- tft.println("Electropeak");
- delay(500);
- tft.fillScreen(PURPLE);
- ....
- start = micros();
- tft.fillRect(cx - i2, cy - i2, i, i, color1);
- t += micros() - start;
- // Outlines are not included in timing results
- tft.drawRect(cx - i2, cy - i2, i, i, color2);
- }
- return t;
- }
有关代码和函数的更多信息,请查看基本TFT LCD命令。
显示BMP图片 - /*
- This code is TFTLCD Library Example
- */
- #include <Adafruit_GFX.h>
- #include <Adafruit_TFTLCD.h>
- #include <SD.h>
- #include <SPI.h>
- #define LCD_CS A3
- #define LCD_CD A2
- #define LCD_WR A1
- #define LCD_RD A0
- #define SD_CS 10
- Adafruit_TFTLCD tft(LCD_CS, LCD_CD, LCD_WR, LCD_RD, A4);
- void setup()
- {
- Serial.begin(9600);
- tft.reset();
- uint16_t identifier = tft.readID();
- if (identifier == 0x9325) {
- Serial.println(F("Found ILI9325 LCD driver"));
- } else if (identifier == 0x9328) {
- Serial.println(F("Found ILI9328 LCD driver"));
- } else if (identifier == 0x7575) {
- Serial.println(F("Found HX8347G LCD driver"));
- } else if (identifier == 0x9341) {
- Serial.println(F("Found ILI9341 LCD driver"));
- } else if (identifier == 0x8357) {
- Serial.println(F("Found HX8357D LCD driver"));
- } else {
- Serial.print(F("Unknown LCD driver chip: "));
- Serial.println(identifier, HEX);
- Serial.println(F("If using the Adafruit 2.4" TFT Arduino shield, the line:"));
- Serial.println(F(" #define USE_ADAFRUIT_SHIELD_PINOUT"));
- Serial.println(F("should appear in the library header (Adafruit_TFT.h)."));
- Serial.println(F("If using the breakout board, it should NOT be #defined!"));
- Serial.println(F("Also if using the breakout, double-check that all wiring"));
- Serial.println(F("matches the tutorial."));
- return;
- }
- tft.begin(identifier);
- Serial.print(F("Initializing SD card..."));
- if (!SD.begin(SD_CS)) {
- Serial.println(F("failed!"));
- return;
- }
- Serial.println(F("OK!"));
- bmpDraw("pic1.bmp", 0, 0);
- delay(1000);
- bmpDraw("pic2.bmp", 0, 0);
- delay(1000);
- bmpDraw("pic3.bmp", 0, 0);
- delay(1000);
- }
- void loop()
- {
- }
- #define BUFFPIXEL 20
- void bmpDraw(char *filename, int x, int y) {
- File bmpFile;
- int bmpWidth, bmpHeight; // W+H in pixels
- uint8_t bmpDepth; // Bit depth (currently must be 24)
- uint32_t bmpImageoffset; // Start of image data in file
- uint32_t rowSize; // Not always = bmpWidth; may have padding
- uint8_t sdbuffer[3 * BUFFPIXEL]; // pixel in buffer (R+G+B per pixel)
- uint16_t lcdbuffer[BUFFPIXEL]; // pixel out buffer (16-bit per pixel)
- uint8_t buffidx = sizeof(sdbuffer); // Current position in sdbuffer
- boolean goodBmp = false; // Set to true on valid header parse
- boolean flip = true; // BMP is stored bottom-to-top
- int w, h, row, col;
- uint8_t r, g, b;
- uint32_t pos = 0, startTime = millis();
- uint8_t lcdidx = 0;
- boolean first = true;
- if ((x >= tft.width()) || (y >= tft.height())) return;
- Serial.println();
- Serial.print(F("Loading image '"));
- Serial.print(filename);
- Serial.println('\'');
- // Open requested file on SD card
- if ((bmpFile = SD.open(filename)) == NULL) {
- Serial.println(F("File not found"));
- return;
- }
- // Parse BMP header
- if (read16(bmpFile) == 0x4D42) { // BMP signature
- Serial.println(F("File size: ")); Serial.println(read32(bmpFile));
- (void)read32(bmpFile); // Read & ignore creator bytes
- bmpImageoffset = read32(bmpFile); // Start of image data
- Serial.print(F("Image Offset: ")); Serial.println(bmpImageoffset, DEC);
- // Read DIB header
- Serial.print(F("Header size: ")); Serial.println(read32(bmpFile));
- bmpWidth = read32(bmpFile);
- bmpHeight = read32(bmpFile);
- if (read16(bmpFile) == 1) { // # planes -- must be '1'
- bmpDepth = read16(bmpFile); // bits per pixel
- Serial.print(F("Bit Depth: ")); Serial.println(bmpDepth);
- if ((bmpDepth == 24) && (read32(bmpFile) == 0)) { // 0 = uncompressed
- goodBmp = true; // Supported BMP format -- proceed!
- Serial.print(F("Image size: "));
- Serial.print(bmpWidth);
- Serial.print('x');
- Serial.println(bmpHeight);
- // BMP rows are padded (if needed) to 4-byte boundary
- rowSize = (bmpWidth * 3 + 3) & ~3;
- // If bmpHeight is negative, image is in top-down order.
- // This is not canon but has been observed in the wild.
- if (bmpHeight < 0) { bmpHeight = -bmpHeight; flip = false; } // Crop area to be loaded w = bmpWidth; h = bmpHeight; if ((x + w - 1) >= tft.width()) w = tft.width() - x;
- if ((y + h - 1) >= tft.height()) h = tft.height() - y;
- // Set TFT address window to clipped image bounds
- tft.setAddrWindow(x, y, x + w - 1, y + h - 1);
- for (row = 0; row < h; row++) { // For each scanline...
- // Seek to start of scan line. It might seem labor-
- // intensive to be doing this on every line, but this
- // method covers a lot of gritty details like cropping
- // and scanline padding. Also, the seek only takes
- // place if the file position actually needs to change
- // (avoids a lot of cluster math in SD library).
- if (flip) // Bitmap is stored bottom-to-top order (normal BMP)
- pos = bmpImageoffset + (bmpHeight - 1 - row) * rowSize;
- else // Bitmap is stored top-to-bottom
- pos = bmpImageoffset + row * rowSize;
- if (bmpFile.position() != pos) { // Need seek?
- bmpFile.seek(pos);
- buffidx = sizeof(sdbuffer); // Force buffer reload
- }
- for (col = 0; col < w; col++) { // For each column... // Time to read more pixel data? if (buffidx >= sizeof(sdbuffer)) { // Indeed
- // Push LCD buffer to the display first
- if (lcdidx > 0) {
- tft.pushColors(lcdbuffer, lcdidx, first);
- lcdidx = 0;
- first = false;
- }
- bmpFile.read(sdbuffer, sizeof(sdbuffer));
- buffidx = 0; // Set index to beginning
- }
- // Convert pixel from BMP to TFT format
- b = sdbuffer[buffidx++];
- g = sdbuffer[buffidx++];
- r = sdbuffer[buffidx++];
- lcdbuffer[lcdidx++] = tft.color565(r, g, b);
- } // end pixel
- } // end scanline
- // Write any remaining data to LCD
- if (lcdidx > 0) {
- tft.pushColors(lcdbuffer, lcdidx, first);
- }
- Serial.print(F("Loaded in "));
- Serial.print(millis() - startTime);
- Serial.println(" ms");
- } // end goodBmp
- }
- }
- bmpFile.close();
- if (!goodBmp) Serial.println(F("BMP format not recognized."));
- }
- // These read 16- and 32-bit types from the SD card file.
- // BMP data is stored little-endian, Arduino is little-endian too.
- // May need to reverse subscript order if porting elsewhere.
- uint16_t read16(File f) {
- uint16_t result;
- ((uint8_t *)&result)[0] = f.read(); // LSB
- ((uint8_t *)&result)[1] = f.read(); // MSB
- return result;
- }
- uint32_t read32(File f) {
- uint32_t result;
- ((uint8_t *)&result)[0] = f.read(); // LSB
- ((uint8_t *)&result)[1] = f.read();
- ((uint8_t *)&result)[2] = f.read();
- ((uint8_t *)&result)[3] = f.read(); // MSB
- return result;
- }
要在液晶显示屏上显示图像,您应将图像保存为24位BMP彩色格式,尺寸为240 * 320。 然后将它们移动到SD卡并将SD卡放入LCD扩展板。 我们使用以下函数来显示图片。 这个函数有3个参数; 第一个参数代表图片名称,第二个和第三个参数代表图片左上角的长度和宽度坐标。 - bmpdraw(“filename.bmp”,x,y);

使用Arduino 2.4寸触摸屏创建一个绘图应用 - /*
- This code is TFTLCD Library Example
- */
- #include <Adafruit_GFX.h>
- #include <Adafruit_TFTLCD.h>
- #include <TouchScreen.h>
- #if defined(__SAM3X8E__)
- #undef __FlashStringHelper::F(string_literal)
- #define F(string_literal) string_literal
- #endif
- #define YP A3
- #define XM A2
- #define YM 9
- #define XP 8
- #define TS_MINX 150
- #define TS_MINY 120
- #define TS_MAXX 920
- #define TS_MAXY 940
- TouchScreen ts = TouchScreen(XP, YP, XM, YM, 300);
- #define LCD_CS A3
- #define LCD_CD A2
- #define LCD_WR A1
- #define LCD_RD A0
- #define LCD_RESET A4
- #define BLACK 0x0000
- #define BLUE 0x001F
- #define RED 0xF800
- #define GREEN 0x07E0
- #define CYAN 0x07FF
- #define MAGENTA 0xF81F
- #define YELLOW 0xFFE0
- #define WHITE 0xFFFF
- Adafruit_TFTLCD tft(LCD_CS, LCD_CD, LCD_WR, LCD_RD, LCD_RESET);
- #define BOXSIZE 40
- #define PENRADIUS 3
- int oldcolor, currentcolor;
- void setup(void) {
- Serial.begin(9600);
- Serial.println(F("Paint!"));
-
- tft.reset();
-
- uint16_t identifier = tft.readID();
- if(identifier == 0x9325) {
- Serial.println(F("Found ILI9325 LCD driver"));
- } else if(identifier == 0x9328) {
- Serial.println(F("Found ILI9328 LCD driver"));
- } else if(identifier == 0x7575) {
- Serial.println(F("Found HX8347G LCD driver"));
- } else if(identifier == 0x9341) {
- Serial.println(F("Found ILI9341 LCD driver"));
- } else if(identifier == 0x8357) {
- Serial.println(F("Found HX8357D LCD driver"));
- } else {
- Serial.print(F("Unknown LCD driver chip: "));
- Serial.println(identifier, HEX);
- Serial.println(F("If using the Adafruit 2.4" TFT Arduino shield, the line:"));
- Serial.println(F(" #define USE_ADAFRUIT_SHIELD_PINOUT"));
- Serial.println(F("should appear in the library header (Adafruit_TFT.h)."));
- Serial.println(F("If using the breakout board, it should NOT be #defined!"));
- Serial.println(F("Also if using the breakout, double-check that all wiring"));
- Serial.println(F("matches the tutorial."));
- return;
- }
- tft.begin(identifier);
- tft.fillScreen(BLACK);
- tft.fillRect(0, 0, BOXSIZE, BOXSIZE, RED);
- tft.fillRect(BOXSIZE, 0, BOXSIZE, BOXSIZE, YELLOW);
- tft.fillRect(BOXSIZE*2, 0, BOXSIZE, BOXSIZE, GREEN);
- tft.fillRect(BOXSIZE*3, 0, BOXSIZE, BOXSIZE, CYAN);
- tft.fillRect(BOXSIZE*4, 0, BOXSIZE, BOXSIZE, BLUE);
- tft.fillRect(BOXSIZE*5, 0, BOXSIZE, BOXSIZE, MAGENTA);
-
- tft.drawRect(0, 0, BOXSIZE, BOXSIZE, WHITE);
- currentcolor = RED;
-
- pinMode(13, OUTPUT);
- }
- #define MINPRESSURE 10
- #define MAXPRESSURE 1000
- void loop()
- {
- digitalWrite(13, HIGH);
- TSPoint p = ts.getPoint();
- digitalWrite(13, LOW);
- pinMode(XM, OUTPUT);
- pinMode(YP, OUTPUT);
- if (p.z > MINPRESSURE && p.z < MAXPRESSURE) {
-
- if (p.y < (TS_MINY-5)) {
- Serial.println("erase");
- tft.fillRect(0, BOXSIZE, tft.width(), tft.height()-BOXSIZE, BLACK);
- }
- p.x = map(p.x, TS_MINX, TS_MAXX, tft.width(), 0);
- p.y = map(p.y, TS_MINY, TS_MAXY, tft.height(), 0);
- if (p.y < BOXSIZE) {
- oldcolor = currentcolor;
- if (p.x < BOXSIZE) {
- currentcolor = RED;
- tft.drawRect(0, 0, BOXSIZE, BOXSIZE, WHITE);
- } else if (p.x < BOXSIZE*2) {
- currentcolor = YELLOW;
- tft.drawRect(BOXSIZE, 0, BOXSIZE, BOXSIZE, WHITE);
- } else if (p.x < BOXSIZE*3) {
- currentcolor = GREEN;
- tft.drawRect(BOXSIZE*2, 0, BOXSIZE, BOXSIZE, WHITE);
- } else if (p.x < BOXSIZE*4) {
- currentcolor = CYAN;
- tft.drawRect(BOXSIZE*3, 0, BOXSIZE, BOXSIZE, WHITE);
- } else if (p.x < BOXSIZE*5) {
- currentcolor = BLUE;
- tft.drawRect(BOXSIZE*4, 0, BOXSIZE, BOXSIZE, WHITE);
- } else if (
小提示:如果要在不使用SD卡的情况下显示图片,可以将其转换为代码然后再显示。 您可以无延迟地连续显示几张照片以制作动画。 但请注意,在这种情况下,Arduino UNO可能不适合(因为处理器速度低)。 我们建议使用Arduino Mega或Arduino DUE开发板。
以上就是本篇文章的全部内容,如遇到问题,请随时在本帖下面进行回复。 |