|
在前面的文章中,我们已经介绍了Arduino与ATtiny系列AVR微控制器之间在规格参数方面的差异。但是,它们两者之间的另一个主要区别在于微控制器的编程方式。
只需通过USB电缆将Arduino开发板插入计算机即可对Arduino板进行编程。除自举程序外,这些开发板还集成了许多外围组件,使它们无需任何特殊连接或软件即可进行编程。
但是,ATtiny系列微控制器不是这种情况。根据项目的规模,可以使用几种不同的方式对ATtiny系列微控制器进行编程。
编程ATtiny微控制器的方法

本文上已经介绍了一种编程ATtiny的方法是使用Arduino Uno作为ISP编程器。使用Arduino作为AVR编程器是对单个单元进行原型制作的不错选择,但是对于生产产品的企业来说是不切实际的。对于使用SMD微控制器的设计而言尤其如此,因为它们无法插入Arduino或面包板。
在本文中,我们将研究对ATtiny微控制器进行编程的三种不同方法,这些方法允许对SMD封装进行编程,并且可以用于从不超过100个单元的小型原型运行扩大到数百个批量生产: ● 使用IC测试夹和ISP编程器进行编程 ● PCB插头连接器或测试点,使用插头连接器或pogo引脚将ISP编程器与PCB进行连接; ● 在将微控制器焊接到板上之前,可以使用SMT测试夹直接进行编程,也可以对芯片进行工厂编程。
定制设计测试PCB 为了测试对ATtiny系列微控制器进行编程的各种方法,我设计了一个简单的测试PCB。
PCB是一个温度计,背面带有DHT22温湿度传感器。在本例中,此传感器仅读取温度。

使用DHT22传感器的定制PCB的后视图。
测试板的正面还带有一排LED,类似于模拟温度计上的汞/酒精管。在较高的温度下更多的LED点亮,此外,LED在低温和高温之间将颜色从蓝色变为红色。

在低温下(例如冬天的外面),LED会发出蓝色光,并且较少的LED灯点亮。

在高温下(例如在热风枪前面),LED会亮红色,并且更多LED灯会亮起。
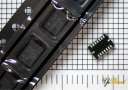
测试板的主要部分包含多种封装,用于安装以下ATtiny系列微控制器之一:ATtiny84、ATtiny85、ATtiny2313和ATmega328。每个微控制器还具有一些无源组件,以使一切正常工作。

PCB还包含用于安装ATtiny 84,ATtiny 85,ATtiny2313或ATmega328的封装。
最后,系统由电路板底部的Micro USB端口供电。
如果要制作自己的温度计测试板,则可以在此处下载Autodesk Eagle设计文件:Eagle设计文件。
生产的PCB为红色,匹配酒精温度计的颜色。除了DHT22之外,所有其他组件都是SMD部件,因此可以通过回流焊接组装电路板。
运行测试PCB的代码 运行测试PCB的代码不太复杂。
在每次循环开始时,微控制器都会从DHT22获取温度读数。然后,使用两个不同的map()语句将温度读数转换为LED的颜色和要点亮的LED个数。 - /*
- Project: ATtiny Microcontroller Test Platform
- Published on Maker Pro
- Author: Scott Hatfield (Toglefritz)
- */
- // CONFIGURATION //
- // If you are using an ATint84, the LEDs are connected to pin 2. For any of the other
- // microcontrollers, the LEDs are connected to pin 4.
- // ATtiny84
- // #define PIN 2
- // ATtiny85 or ATTiny2313 or ATmega328
- #define PIN 4
- // NEOPIXEL SETUP //
- // Include the Adafruit NeoPixel library
- #include <Adafruit_NeoPixel.h>
- #define NUMPIXELS 7 // There are seven LEDs on the board
- // Set up the NeoPixel library
- Adafruit_NeoPixel pixels(NUMPIXELS, PIN, NEO_GRB + NEO_KHZ800);
- // DHT22 SETUP //
- #include "TinyDHT.h"
- // The temperature sensor is connected to pin 3 for all microcontrollers
- #define DHTPIN 3
- #define DHTTYPE DHT22 // DHT 22 (AM2302)
- DHT dht(DHTPIN, DHTTYPE); //// Initialize DHT sensor
- // SKETCH VARIABLES //
- float temp; // Stores temperature value
- int color; // The color of the LEDs, for use with the Wheel() function
- int number; // The number of LEDs to illuminate
- void setup() {
- // Set up the LEDs
- pixels.begin(); // Initialize NeoPixel object
- pixels.clear(); // Set all pixel colors to 'off' to start
- pixels.setBrightness(50); // The LEDs do not need to be super bright
- dht.begin(); // Initialize the DHT22 object
- }
- void loop() {
- // Read the temperature
- int16_t temp = 30;//dht.readTemperature();
- // Reading temperature or humidity takes about 250 milliseconds!
- delay(250);
- /*
- The DHT22 is capable of measuring temperatures between -40C and 125C. But, because this is supposed to
- be hand-held device, we will map the temperatures only to between -25C and 40C.
- */
- // Map the temperature reading to a color number used for the LEDs. At the coldest temperatures, the light will be blue,
- // at the hottest, the light will be red.
- color = map(temp, -18, 30, 75, 1);
- // Then, map the temperature reading to a number of LEDs to illuminate. At the lowest temperatures, only the bottom LED will
- // illuminate, at the hightest temperatures, all LEDs will illuminate.
- number = map(temp, -18, 30, 0, 6);
- // Set the LEDs to the color corresponding to the current temperature reading
- for(int i = 0; i <= number; i++) {
- pixels.setPixelColor(i, Wheel(color));
- }
- pixels.show();
- }
- // Wheel() is a helper function to get colors from single values between 0 and 255
- // Input a value 0 to 255 to get a color value.
- // The colours are a transition r - g - b - back to r.
- // For a visual representation of the values, see https://docs.google.com/spreadsheets/d/1vYsRDL4QzcZtP30jqQByM2pK3_Xq2RPOyVwkcxQOnPI/edit?usp=sharing
- uint32_t Wheel(byte WheelPos) {
- if(WheelPos < 85) {
- return pixels.Color(255 - WheelPos * 3, 0, WheelPos * 3);
- }
- else if(WheelPos < 170) {
- WheelPos -= 85;
- return pixels.Color(0, WheelPos * 3, 255 - WheelPos * 3);
- }
- else {
- WheelPos -= 170;
- return pixels.Color(WheelPos * 3, 255 - WheelPos * 3, 0);
- }
- }
使用测试PCB尝试ATtiny编程方法 如前所述,有三种主要的ATtiny系列微控制器编程方法。PCB电路板是一种温度计,带有DHT22温度传感器以及一排LED,用于根据颜色和发光LED的数量指示当前温度。 本系列的后续部分将全部使用同一测试板来说明如何使用上述编程方法。 |